This post is a my version of the Origami Pocket Fold Wallet that I adapted from Alisa Golden's version in her book "Making Handmade Books".
My version is quite a bit smaller and more rectangular. The finished version of my book is approximately 2 1/2" x 5 3/8".
Here's what you will need: A thin sheet of paper 6" x 21", ruler, pencil, bone folder, knife, and
stylus (optional).
I chose to use Unryu paper. It is very thin, 25 gsm, and as you might be able to see it is translucent. It holds up well for folding and since there is a bit a layering with this fold, this paper doesn't add a lot of bulk with each fold. It also is very forgiving.
Folding the Wallet
Start by folding the paper in half, hamburger style.
Unfold it and make a pencil line 1/4" from the center fold on both sides.
Fold each end inward to the new lines. It will leave a 1/2" gap between the 2 halves.
Because there is a lot of folding and unfolding with this structure, make sure you run a bone folder over edges that get folded, so that it is easier to refold when called for.
Unfold. You will now have 4 sections.
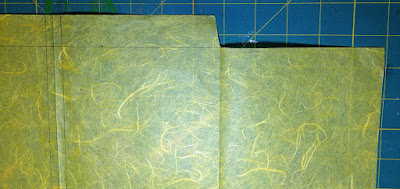
Now, make a pencil line 1" from the top of page. It should go all the way across. Score this line with a bone folder or stylus, but don't fold it down yet.
Instead, you are going to cut the left and right rectangles out, leaving just the two middle rectangles.
Then fold the bottom edge up to the 1" pencil mark.
Unfold again.
From there, you will want to make a mark 1 1/4" in, on both the top and bottom edges for the left and right sections.
Using your ruler as a guide, score a line from the corner of the middle section to the each of the
1 1/4" marks and then fold over.
This creates a triangle fold for the two end sections.
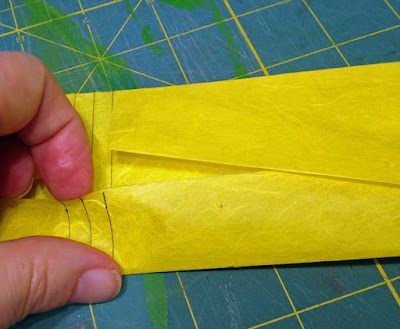
After you have both triangles fold, fold the entire section in. It should look like this.
Flip the entire thing over, so that the folds are underneath.
Then fold the bottom edge up to the 1" pencil mark at the top.
And now fold the 1" top piece down, going over the bottom edge that you just folded up, and tuck it into the triangle folds.
Then fold the entire wallet in half.
And your done!
This wallet actually creates 6 pockets, 4 on the pages themselves and 2 interior pockets.
 |
| interior pocket |
Now, because the paper I'm using is so thin, I don't think it will hold up very well to a sewn binding. So, I added a center strip of black linen tape to the middle of each of my wallets.
 |
| Detail |
Next week, I will be binding the wallets together with a kettle stitch to make a signature block.
Until then,
Happy Book Binding!
Sheila


No comments:
Post a Comment
Note: Only a member of this blog may post a comment.