Encasing Structure's Content

This is a weekly blog that I have created with the sole purpose of creating a hand bound book once a month. I will be showing the entire process from start to finish. Although I would appreciate some mention of credit, please feel free to use and share any information found on this blog. The creative process rarely happens in a vacuum.

Monday, August 17, 2015

August 17, 2015 - Week 2, Origami Pocket Fold Wallet

Hi Everyone,

This post is a my version of the Origami Pocket Fold Wallet that I adapted from Alisa Golden's version in her book "Making Handmade Books".

My version is quite a bit smaller and more rectangular.  The finished version of my book is approximately 2 1/2" x 5 3/8".


Here's what you will need:  A thin sheet of paper 6" x 21", ruler, pencil, bone folder, knife, and
stylus (optional).

I chose to use Unryu paper.  It is very thin, 25 gsm, and as you might be able to see it is translucent.  It holds up well for folding and since there is a bit a layering with this fold, this paper doesn't add a lot of bulk with each fold.  It also is very forgiving.

Folding the Wallet

Start by folding the paper in half, hamburger style.

 
Unfold it and make a pencil line 1/4" from the center fold on both sides.


Fold each end inward to the new lines.  It will leave a 1/2" gap between the 2 halves.


Because there is a lot of folding and unfolding with this structure, make sure you run a bone folder over edges that get folded, so that it is easier to refold when called for.


Unfold.  You will now have 4 sections.

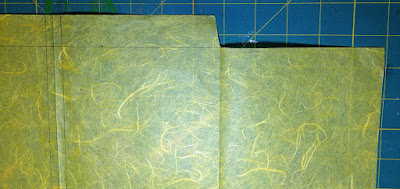
Now, make a pencil line 1" from the top of page.  It should go all the way across.  Score this line with a bone folder or stylus, but don't fold it down yet.


Instead, you are going to cut the left and right rectangles out, leaving just the two middle rectangles.


Then fold the bottom edge up to the 1" pencil mark.


Unfold again.

From there, you will want to make a mark 1 1/4" in, on both the top and bottom edges for the left and right sections.


Using your ruler as a guide, score a line from the corner of the middle section to the each of the
1 1/4" marks and then fold over.


This creates a triangle fold for the two end sections.


After you have both triangles fold, fold the entire section in.  It should look like this.


Flip the entire thing over, so that the folds are underneath.


Then fold the bottom edge up to the 1" pencil mark at the top.


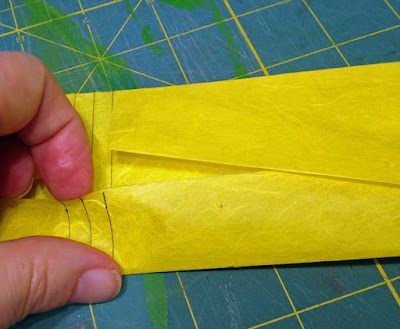
And now fold the 1" top piece down, going over the bottom edge that you just folded up, and tuck it into the triangle folds.


Then fold the entire wallet in half.


And your done!

This wallet actually creates 6 pockets, 4 on the pages themselves and 2 interior pockets.

interior pocket


Now, because the paper I'm using is so thin, I don't think it will hold up very well to a sewn binding.  So,  I added a center strip of black linen tape to the middle of each of my wallets.


Detail
This will hopefully provide some stability to spine.

Next week, I will be binding the wallets together with a kettle stitch to make a signature block.

Until then,

Happy Book Binding!

Sheila


Monday, August 10, 2015

August 10, 2015 - Week 1, Introduction

Hello Everyone,

I'm back from vacation and ready to start this month's book.

I recently had a friend give me some Saint of the Day cards.


So this month I thought I would tackle the problem of how to work them into a book.

Since they have the picture of the Saint on the front and a description of them on the back, I didn't want to just glue them onto a page.  So as I was looking for folder or pocket book forms, I came across the Origami Wallet in Alisa Golden's "Making Handmade Books".  I liked the fact that it has both pockets on the outside and a pocket in the middle of the signature.

Here is my sample of Alisa Golden's wallet as she has instructed in her book:


It is a bit to squarish for my needs so I had to rework into a smaller rectangular form:


As you can see, the Saint cards fit nicely, but I am concerned about the openness of the pockets, so I will need to address that issue for the final signature.

Since each signature has 4 pockets on the outside, I only need to create 12 signatures, one for each month.  I will also need to have a title page, possibly an index page and a back page as well.  I will be making a hard cover for this book.  And I'm planning to use the Secret Belgium Binding to connect the cover to the signatures.

It should be quite an exciting month.

Next week, I will give the instructions for creating my modified version of Alisa Golden's "Origami Wallet".

Until then,

Happy Book Binding!

Sheila

Monday, July 27, 2015

July 27, 2015, Week 4 - Binding and Final Book

Hello Everyone,

This week I'm binding the book with the French Link Stitch.


Here's what you need:  The signatures lined up and ready to go, a book binding needle, waxed linen thread (Mine is a brown color that I thought would like nice against the white pages.  It's a little over 5 ft. in length.) and a clip to hold the pages together as you sew.

I started with the last set of signature and worked my way forward.

Starting with the hole at the top, I inserted the needle and thread through the outside to the inside


leaving about a 4 to 5 inch tail.  (Most instructions usually say to leave about 2, but my Fingers are not that nimble, so I find the extra length helps when I have to tie it.


Then I wove the thread in and out of the holes for the length of the signature.


As you can see, the thread is on the outside of the signature after it is woven.

Here is what the inside looked like.


Then I took the next signature and ran the thread from the outside in.


No knot or tie is necessary for this juncture.

I then inserted the needle into the second hole (inside to outside) and ran the needle underneath the first thread line of the first signature.


From there I inserted the needle into the third hole and back up the fourth hole.  Once again running the needle underneath the second line of thread from the first signature and then back down into the fifth hole.

The Pattern continued until the second signature was complete.


When I got the the end, I took the teil that I had left at the beginning and tied a square knot to secure the two signatures together.

Then I added the third signature by just inserting my needle from the outside to the inside.  I did find that securing the pages together did help keep things lined up and allowed me to tighten the Stitches better.


For the third set of weavings I had to adjust the first set by just pushing them with my needle a bit, so that I when I threaded the needle I was only picking up the thread of the second signature set.


I put together a quick Illustration so that hopefully the Pattern is a little easier to get.


Once I got to end of the third signature and added the fourth signature, I used a Coptic stich to secure the two together.


I continued sewing and added the fifth signature and ended the binding by tieing off the thread.

And the book is complete


Detail of the French Link stitch:


More views:


This was a fun book to do.  I do think though, if I use this stitch again, I will have more signatures, so the stitching is clearer.

Next week, I begin August's book.

Until then,

Happy Book Binding!

Sheila

Monday, July 20, 2015

July 20, 2015, Week 3 - Content and Template

Hello Everyone,

This week I was able to make the two drawings to add to my Lemonade book.

I did do a bit of photo editing on them before I printed them for the book.  (I decided to print them instead of glueing in the originals to help keep the pages similiar.  This will help the binding look more uniform.)
 

With the content is complete,  I have folded and organized my pages and they are ready for binding.


I'm beginning by creating a template for the stitching holes.  For my version of the French Link Stitch, there will be a Coptic stitch on the top and bottom and three French Link Stitches in the middle.


For my templates, I always mark TOP, usually as big as I can.  (I am very good at not paying attention to what is the top and this can make your stitching crooked.)  So from the top to the bottom, I measured and marked 1 inch, from that mark 1 1/4 inches, then 1 inch, then 1/2 inch, then 1 inch then 1/2 inch, then 1 inch, then 1 1/4 inches and then 1 inch.  There will be 1 1/4 Inches between the Coptic stitches and the French Link Stitches and just a 1/2 inch between each of the French Link stitches.


Next, using an awl, I punched holes in each page, aligning the template with the center fold of each page.  Take the time to make sure you align the template perfectly, always putting the top of the template with the top of the page and that you punch the holes exactly on the mark and in the crease.  The more accurate your holes, the nicer your binding will look.


If you have a punch cradle, by all means use it, but it's not necessary.


Once all the holes on the page are punched, it should look similiar to the above.  Not the greatest picture, but you do want to make sure your holes are where they need to be.

Then I continued to punch the holes for all the pages.

With that done, I'm ready to sew.  

Soooo, next week will be a demo of the stitching process and the final book.

Until then,

Happy Book Binding!

Sheila

Monday, July 13, 2015

July 2015, Week 2 - Content

Hello Everyone,

The book is progress along on time this month.  Yea!  So I was able to print the entire book out and work on the lemon designs that I wanted to hand print on the book.

I thought because the theme was old-fashioned summer, that I would print my lemon designs in an old-fashioned way, by hand using what I had around my house.

After an awful and time consuming attempt at creating a stamp, I settled on creating 3 lemon design stencils.


I used some very heavy weight, printmaking paper (280 lb weight)  and cut out the designs.  Then using a small brush and my liquid acrylic paints, I dabbed the paint on the pages.  I did not use any tape to secure the stencils, I just held it down with my fingers.  Although often times artists get caught up in wanting to make everything exact and perfect, that is the opposite of the look I wanted for the lemon designs.  I want them to be slightly irregular, so that it will look like they are done by hand.

Here's the finished result:


So far so good.

For next week, I will be adding the drawings and preparing the book for binding  (ie.  setting up the page template and piercing the holes).

Till then,

Happy Book Binding!

Sheila

Monday, July 6, 2015

July 6, 2015 Week 1 - Introduction

Hello Everyone,

Well summer is underway (finally!) here in Wisconsin.  So I thought I'd start by sharing a beautiful dahlia that bloomed in my garden today.


This is my first year to grow them, so this was a pleasant surprise.


Now on to books.  This month's book will be a  French Link stitched book with soft cover.   The theme is "Old-fashion Summer".  And so I thought I would create a book with Lemonade Recipes.

The French Link stitch is a wonderful stitch that involves creating a twist between two threads on two different signatures.  This creates a beautiful soft X pattern down the spine of the book.  Most of French Link stitched also have a row of coptic stitching at the top and bottom.  I have posted some examples of this stitch on my Encasing Structure Pinterest board.   link:  Pinterest Encasing Structure Board

For my lemonade book, I will use  5 double page signatures.  This gives me a total of 40 pages.  (a single page signature is 4 pages, a double page signature is 8)

I find its always helpful to create a dummy book.  For this one, I'm starting with an unbound Dummy that I can take apart and make sure that I am organizing it properly for the layout template.

Dummy Book - 5 double page Signaturen

Then I marked what each of the pages will be and I also include a page number.

front of 1st double signature
As you can see, when you flatten out the individual signatures, the pages do not go order.

back of 1st double signature

I find doing this prior to setting up my template on the computer is a must.  I am less likely to make major layout errors.  FYI - I am using Microsoft Word, for the text layout and printing.  You certainly could use Adobe's InDesign or equivalent to set up the pages.  I just chose Word because it is what I have available on this computer.

So there's my start to this month's book.  Next week, I will be showing how to do create a simple print design with stuff from around my house and acrylic paint.

Till then,

Happy Book Binding!

Sheila